Step 5: MAKE YOUR BLOG SUCCESSFUL

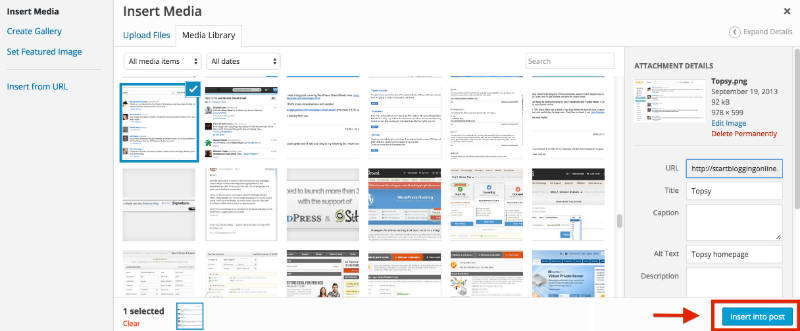
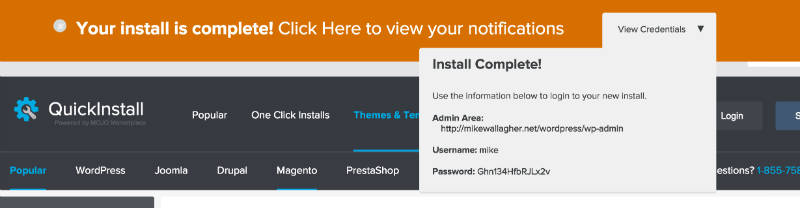
(taken from my personal laptop).
Now that you have set up your blog and know the basics, it’s time to make your blog successful. Many
beginners struggle at that point, thus I’ve put together a handful of guides to get you going easier.
beginners struggle at that point, thus I’ve put together a handful of guides to get you going easier.
If I were you, I’d suggest you to go and check my resource page here. It contains all the content that I’ve published on StartBloggingOnline.com over the past couple of years. It’s nothing too much, but enough to get you going and a bit more.
Things to do after you’ve created your blog:
The first thing I’d do is create a proper About Me and Contact page.
- Creating a perfect about me page (This is usually the most visited page on your blog)
- Adding a Contact Page/Form on your blog (So that your readers could contact you)
Done those two? Go and read those posts.
- 8 Common blogging mistakes (That many bloggers do, including me)
- Where to find FREE images for your blog (Without braking the copyright)
- 135+ blog post ideas for your NEW blog (Warning: HUGE list)
Ready to take your blog into next level?
Once you have some content on your blog it’s time to get some traffic and make it profitable.
- Get your blog listed on Search Engines (Google, Bing, Yahoo)
- Get more traffic to your blog (I’ve used those techniques personally and they’ve worked well)
- How to monetize your blog (Affiliate marketing, selling advertising space, getting new clients etc…)
- Add a subscription box (So you could email your blog visitors personally)
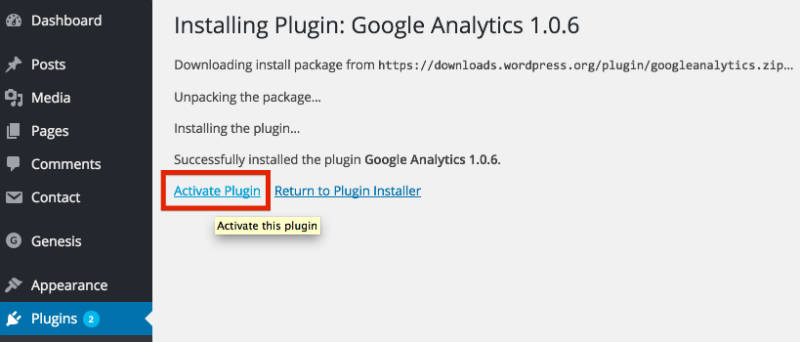
- Set up Google Analytics (For tracking your blog visitors)
FAQ (Frequently Asked Questions)
Q: What blog site should I use?
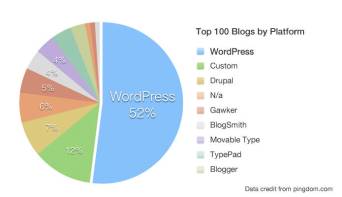
A: WordPress is the most popular platform, powering over 25% of the web! Best of all: it’s free.
A: WordPress is the most popular platform, powering over 25% of the web! Best of all: it’s free.
Q: What blog should I start?
A: Recipe blogs, fitness blogs, and business blogs are some of the most popular. Here’s how to pick a blog topic people will really want to read.
A: Recipe blogs, fitness blogs, and business blogs are some of the most popular. Here’s how to pick a blog topic people will really want to read.
Q: How do bloggers make money?
A: There are a number of ways including advertising and digital products, but some people just do it for fun. Check out my article How To Make Money From Your Blog.
A: There are a number of ways including advertising and digital products, but some people just do it for fun. Check out my article How To Make Money From Your Blog.
Q: How Do I Pick A Domain Name?
A: I would suggest using your real name (because you can change it later). Here’s more on picking a domain name.
A: I would suggest using your real name (because you can change it later). Here’s more on picking a domain name.
Q: Are blogs social media?
A: Blogs can be considered social media, because they have comments and social interactions. However from a technical standpoint, analytics software does not count blog traffic as social media traffic.
A: Blogs can be considered social media, because they have comments and social interactions. However from a technical standpoint, analytics software does not count blog traffic as social media traffic.
Q: Is blogging dead?
A: No way! Over 409 million people read blog posts every month. You’re reading one right now!
A: No way! Over 409 million people read blog posts every month. You’re reading one right now!
Q: What’s the difference between a blog and a website?
A: Blogs are frequently updated with articles while a website is generally “set it and forget it”. Blogs might have less features than a website and just focus on creating really good content. For this reason a blog is more socially active, with shares and comments.
A: Blogs are frequently updated with articles while a website is generally “set it and forget it”. Blogs might have less features than a website and just focus on creating really good content. For this reason a blog is more socially active, with shares and comments.