Step 4: Adding/Writing Blog Posts and Pages
By now you should have fully working WordPress blog on your own domain name. You should also have a custom blog theme that fits with your blog’s topic. Congratulations – you’ve done a LOT and I’m proud that you’ve managed to get so far.
In the LAST step, I’ll show you how to write your first blog post and share some tips for writing blog posts.
In this section, I’ll show you…
In this section, I’ll show you…
- How to write a post inside WordPress
- How to add images, links and format text
- Some quick tips and tricks for writing great content
Using WordPress to Blog
Adding a New Post
To add a new blog post, click the “Posts” section on the left hand side-menu, then click on “Add New”.
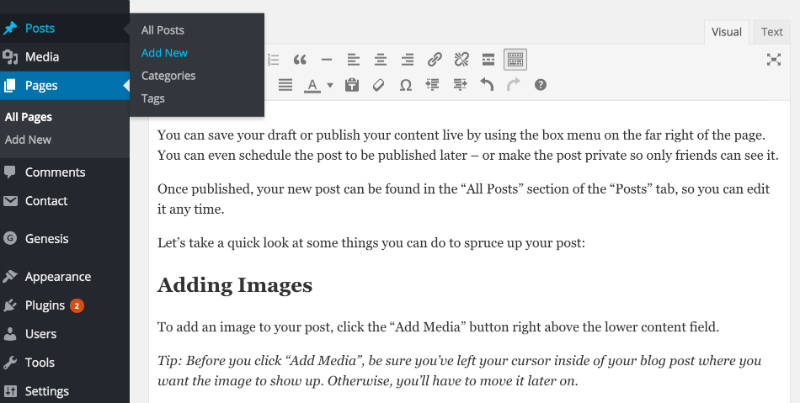
On the next screen, you’ll see something like this:
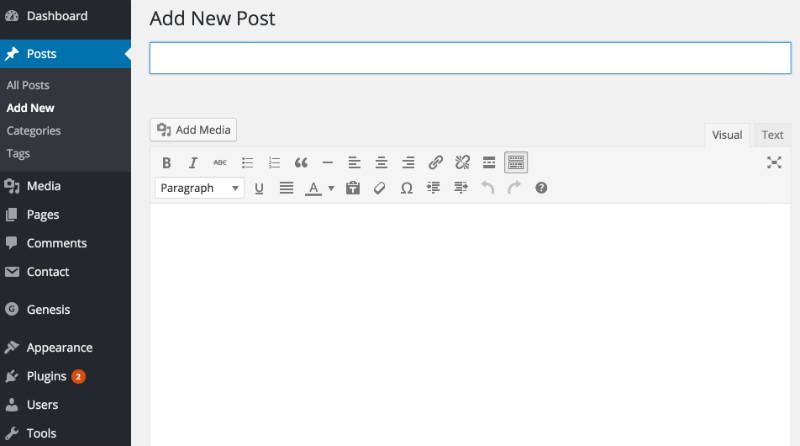
You can add the title to your blog post in the top field, and your content goes in the big text box below the title.
You can save your draft or publish your content live by using the box menu on the far right of the page. You can even schedule the post to be published later – or make the post private so only friends can see it.
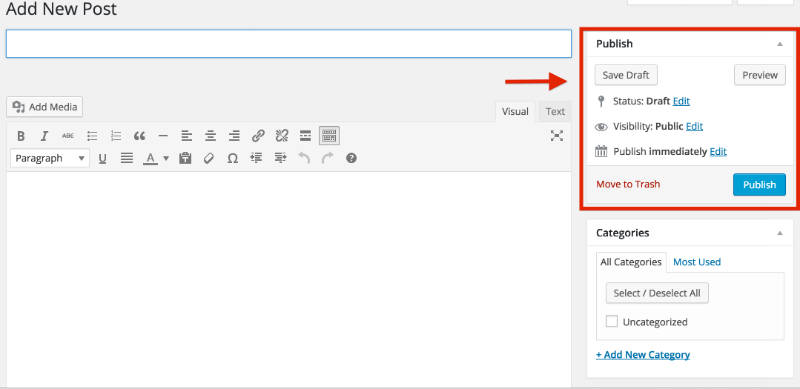
Once published, your new post can be found in the “All Posts” section of the “Posts” tab, so you can edit it any time.
Let’s take a quick look at some things you can do to spruce up your post:
Adding Images
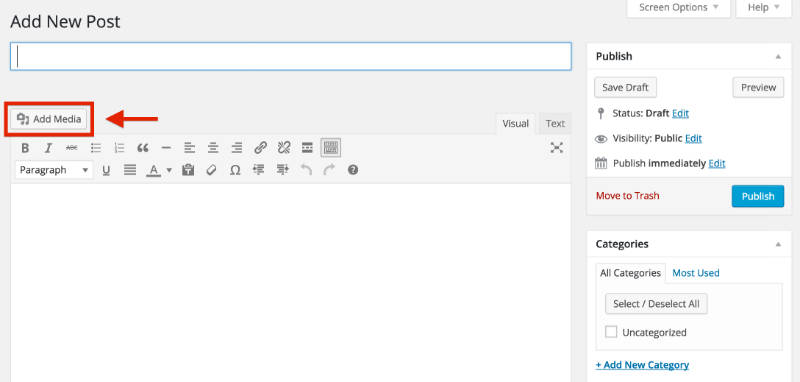
To add an image to your post, click the “Add Media” button right above the lower content field.
Tip: Before you click “Add Media”, be sure you’ve left your cursor inside of your blog post where you want the image to show up. Otherwise, you’ll have to move it later on.
Next, click the “Upload Files” tab on the screen that pops up, then click “Select Files”.
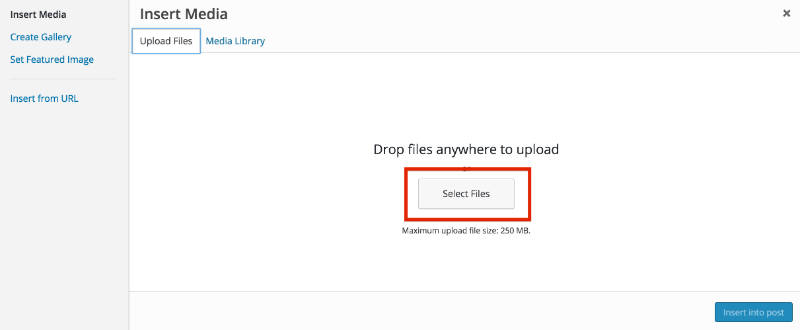
Once you’ve found the file, double click it and WordPress will upload it automatically.
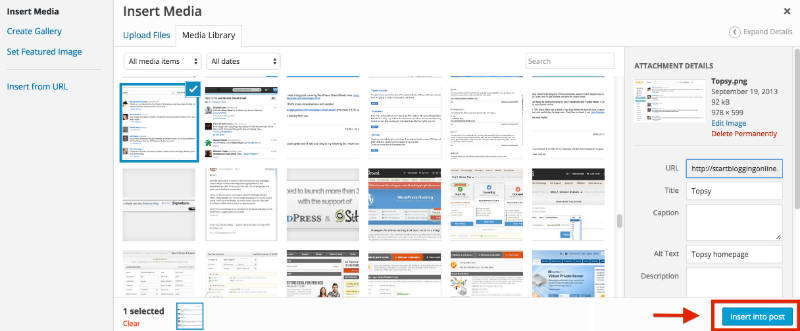
When the upload is finished, make sure the image you want is selected, then click the “Insert into post” button to add the image to the post you’re writing.
Adding a Link
Linking out to other websites is a great way to build relationships and share interesting content.
To add a link, click on the icon in the toolbar that looks a bit like a chain link.

On the pop-up, you’ll need to enter a few important bits of information.
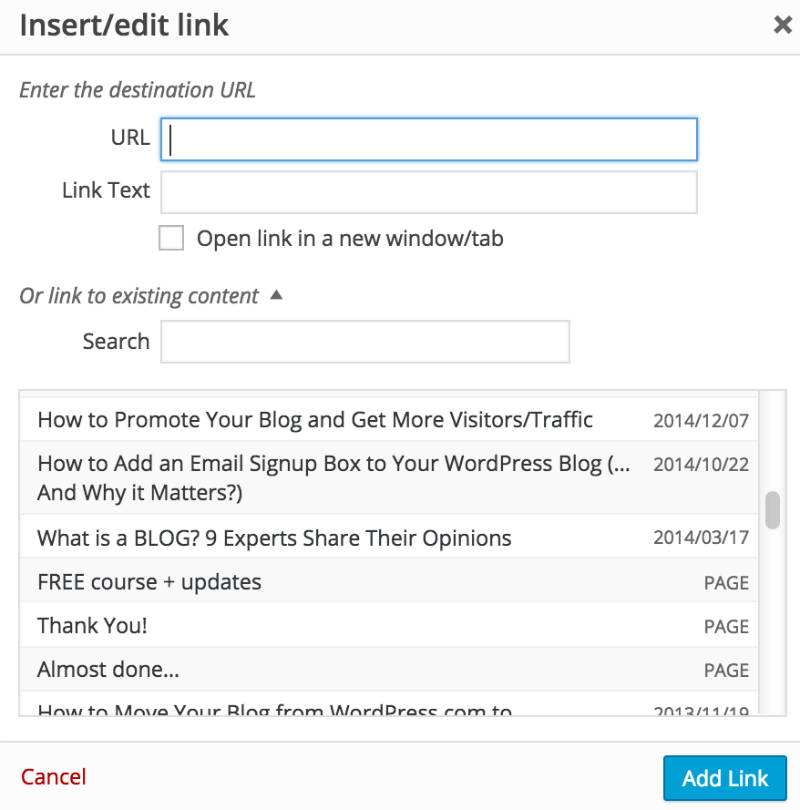
- URL is the web address of the link you want to share. Make sure you include “http://” before the “www.” address, or your link will be broken.
- “Link Text” is the text you want people to click on to get to your link. It might be “Click here”, or anything you choose.
- “Open link in a new window/tab” – it’s a smart idea to check this box. Otherwise, when someone clicks your link, they’ll leave your blog.
- If you want to link to an existing page, you can use the “Search” section to find a post or page you’ve already created and click it to add a link.
Finally, click “Add Link”, and your link will be added where you left your cursor in the post you were writing.
Adding Headers & Editing Text
It’s a good idea to use headers and bolding to make your content easier to read and scan.
Adding Headings
To add a heading, click on the drop-down menu on the bottom left of the toolbar.
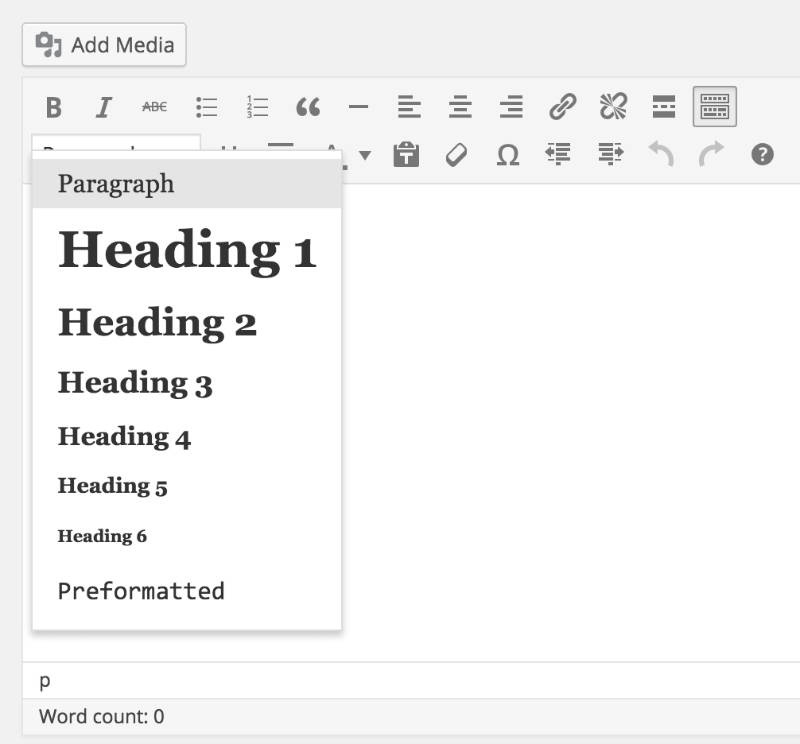
Try to only use “Heading 1” once within your page (usually at the top), and use “Heading 2” or “Heading 3” for other sections in the copy, as this is better for search engines.
Tip: You can also highlight the text you want to change in your blog post, THEN click on the dropdown menu and select the format you want the text to be in.
Editing Fonts
You can also bold, italicize, underline and even change the colour of your text in a click or two.

- “B” is for bolding
- “I” is for italics
- “U” is to underline your text
- “A” will open a dropdown menu where you can select font color
As you can see, this is all pretty simple for someone who has worked with Microsoft Word.